Measuring a staircase is an important step in its planning and production.
Determine the position of the staircase start, specifically the front edge of the first step = define the length of the lower staircase flight.
This is usually specified in the project documentation. If not defined, the following approach can be used:
An optimal staircase requires approximately 165 mm of floor space per 100 mm of height. For a height of 2800 mm, this results in a length of approximately 4600 mm.
A steep staircase requires approximately 140 mm of floor space per 100 mm of height, resulting in approximately 3900 mm for a height of 2800 mm.
A very comfortable staircase requires approximately 190 mm of floor space per 100 mm of height, resulting in approximately 5300 mm for a height of 2800 mm.
IMPORTANT: These dimensions refer to the walking line (also called the line of travel = the walking path on the staircase). Therefore, when measuring along the outer edge of the staircase, it is necessary to subtract approximately two meters (two staircase widths) from the measured length.
Verify that the exit edge forms a right angle with the length L3 measured in the next step. If the angle is “closing” (not perfectly square), this deviation must be taken into account and subtracted from the measured plan length.
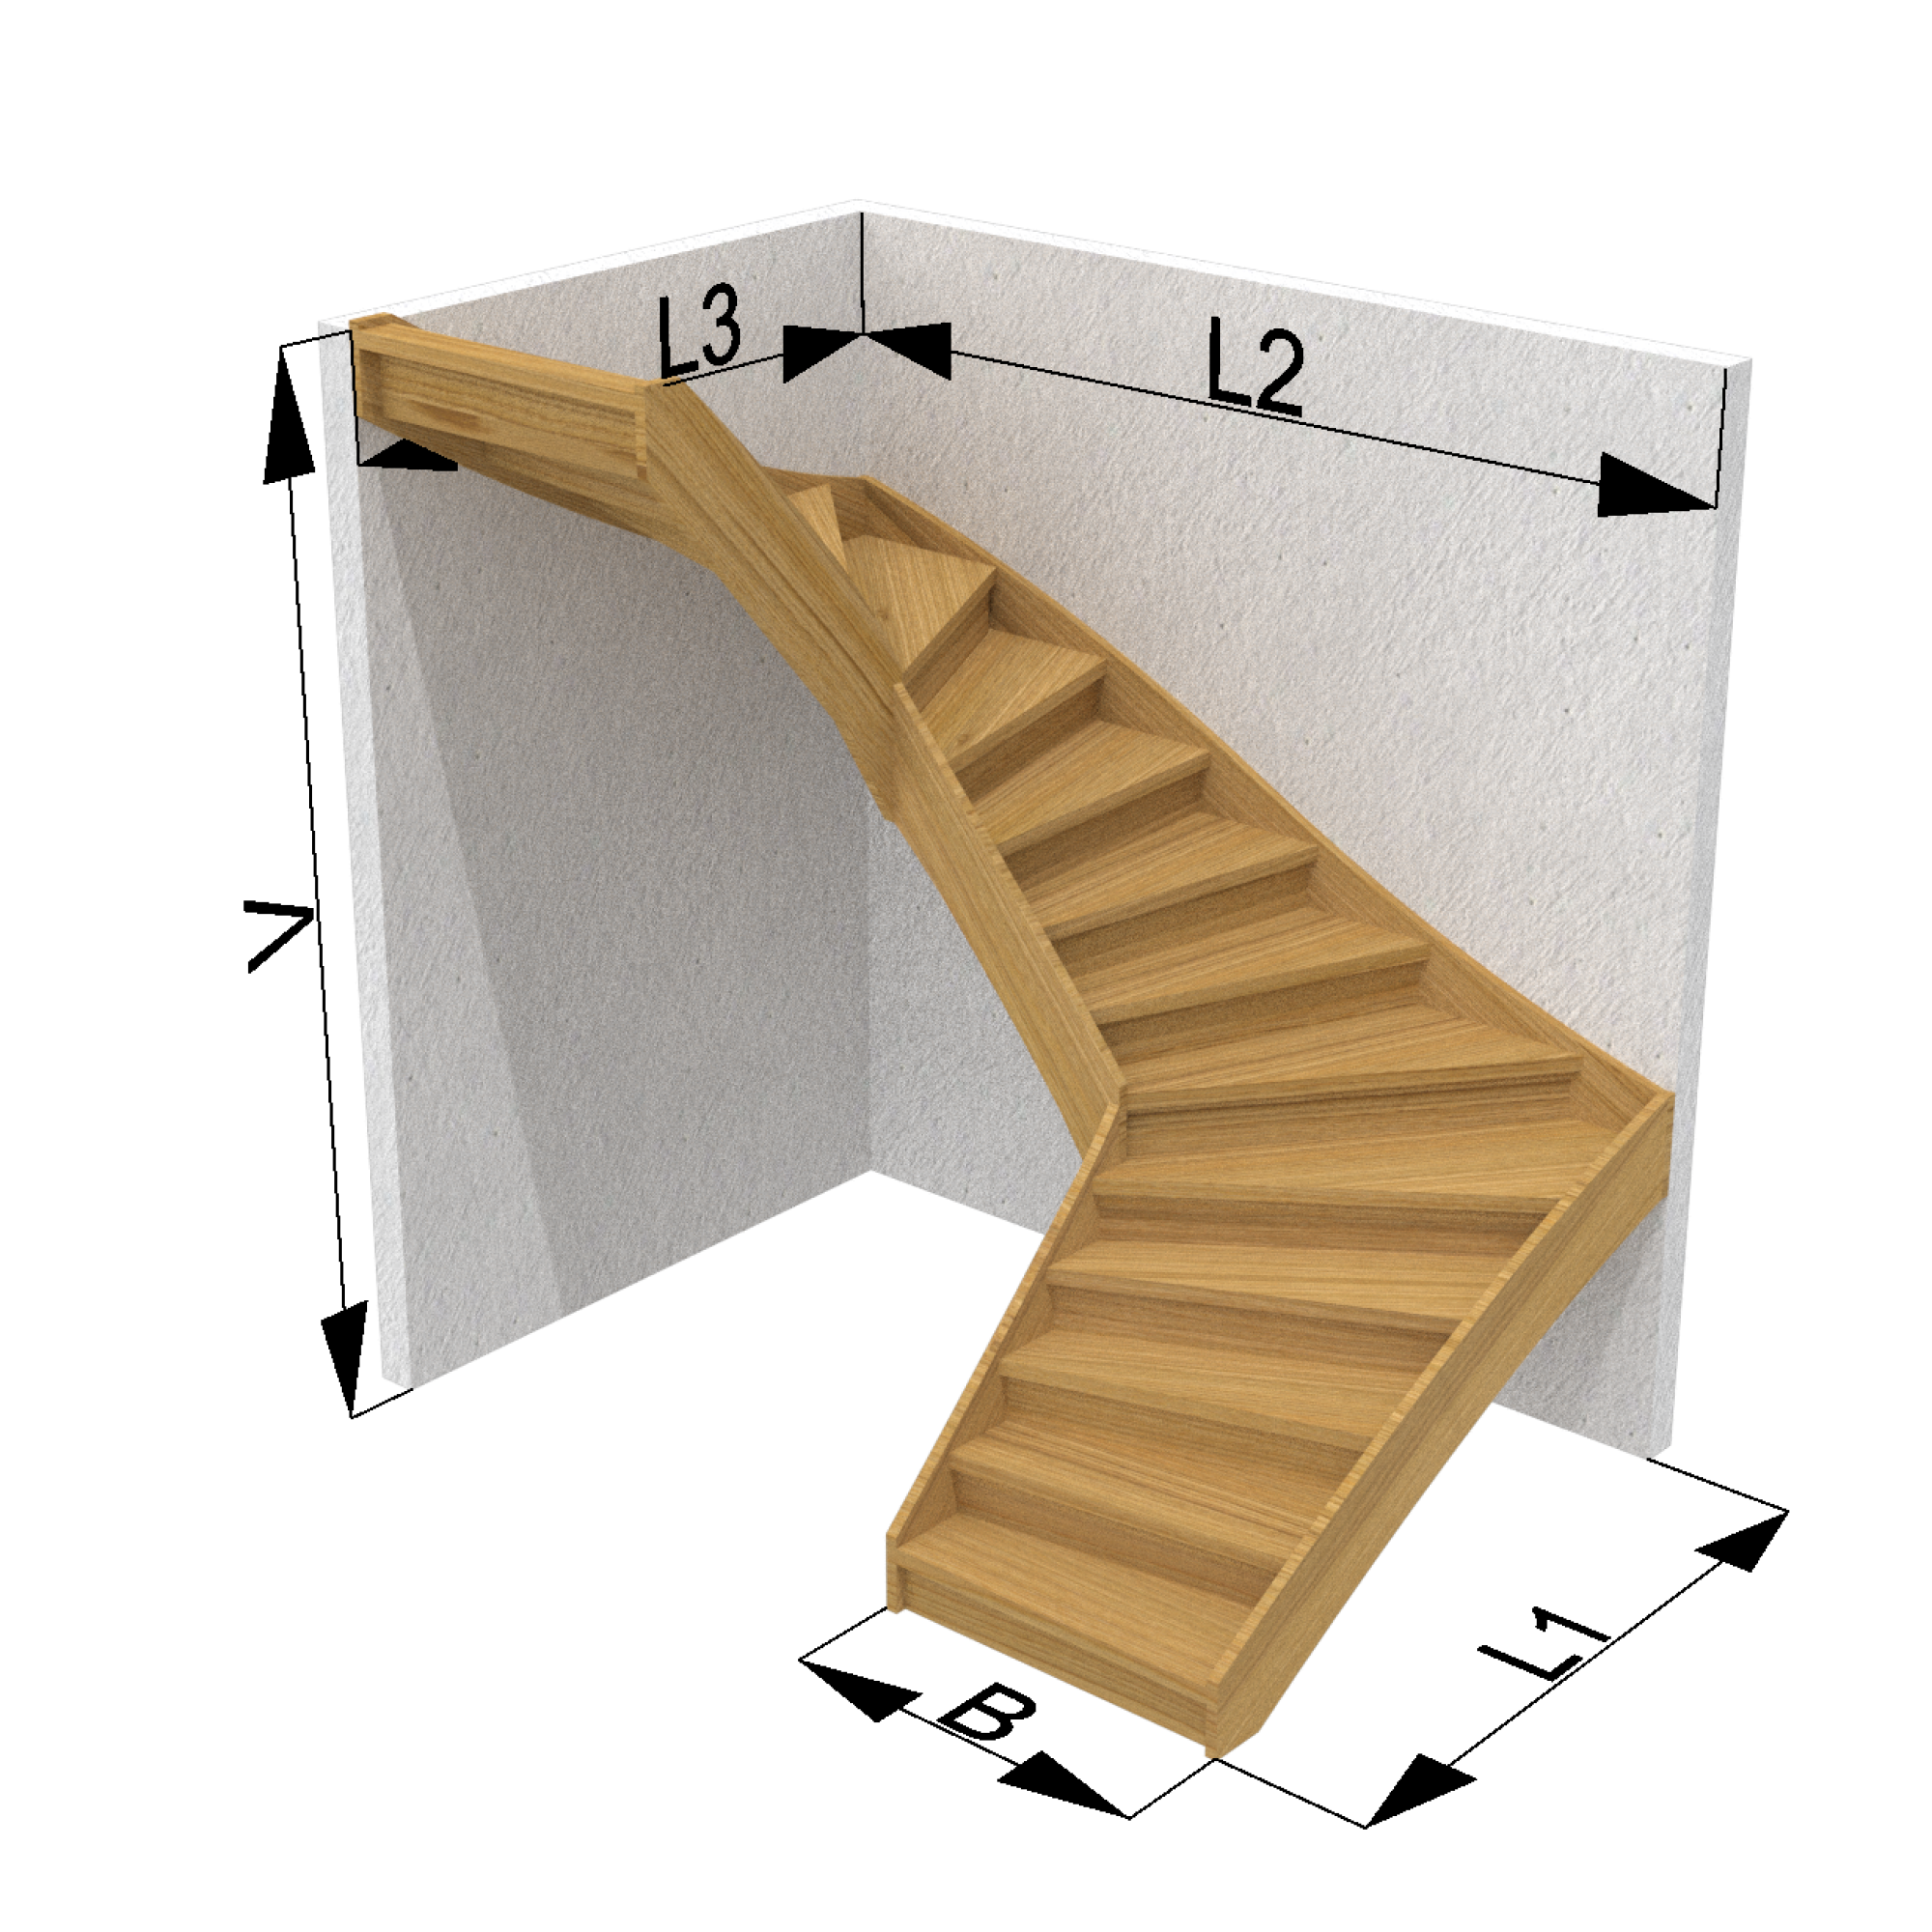
Now measure the length of the upper staircase flight L3 – drop a vertical line from the exit point down to the lower floor (ideally along the wall next to the flight, if available), and from there measure the distance to the second outer corner of the staircase. If there is a wall directly beneath the exit edge down to the floor, the measurement is easier. However, always check vertical alignment and correct if necessary. If the exit edge is “set back” behind the plane of this wall, do not forget to add the difference.
Then continue from the second outer corner and measure the length of the middle (second) flight L2 to the first outer corner.
Finally, measure the length of the lower staircase flight L1 = from the first outer corner to the front edge of the first step.
Be aware of existing (or future) door casings next to the staircase entry, as they may collide with the stringer. It is also recommended to measure openings, doors, and other elements in or on the walls adjacent to the staircase and evaluate possible collision risks.
Measure the size of the structural opening (usually rectangular) and determine the staircase width accordingly; we recommend a minimum width of 1 m. If the L2 flight is shorter than 2 m, pay attention to the width of the staircase well opening to ensure that there is at least a 40 mm gap between the lower and upper flights for finger clearance along the handrail. If the upper flight is tightly surrounded by walls or ceilings, again remember to leave sufficient finger clearance space along the future handrail. The structural opening may have a very irregular shape – in such cases, it is recommended to first sketch it separately in the correct proportions and verify all dimensions on the drawing.
To compensate for possible wall unevenness, we recommend reducing the staircase width by 5 mm.
After measuring the lengths of flights L1, L2, and L3, it is very important to verify that they form precise right angles with each other. If not, the deviation must be correctly accounted for when entering the dimensions of the required rectangular staircase layout.
When measuring the height, it is recommended to follow these guidelines: take the measurement at the center of the width of the future staircase exit edge (to eliminate floor unevenness). Using a long straight batten and a spirit level, check the levelness of the lower floor between the staircase entry and the point below the staircase exit where the vertical height is measured. Correct the measured staircase height according to any detected difference.
Ideally, the height difference should be measured between finished floor surfaces. If the final floors are not yet completed but their build-up layers are already defined, it is easiest to simulate the future thicknesses (parquet, tiles, marmoleum, etc.) and again measure the difference between the finished floor levels. This helps avoid mistakes when subtracting or adding floor thicknesses.
The final important staircase dimension is the headroom clearance. This only applies to staircases where the staircase entry is located beneath a ceiling in the room. It is measured as the clear vertical distance between the lower edge of the ceiling opening and the stair tread directly below it. The ideal clearance is 220 cm or more.
If this can be determined and calculated from the project documentation, it should definitely be checked.
When designing two staircases positioned above one another, it is necessary to consider the size of the opening beneath the upper staircase during the planning stage. This prevents a situation where the staircase would partially “fall into the opening.” We therefore recommend that the upper staircase overlaps the opening below by 100–150 mm.